Quick Start
Why is this section placed first? Because a small demo is worth a thousand times more than raw documentation. This demo uses Django-Headless-CMS to create content and publish APIs while utilizing Astrowind as the front-end framework for display.
Demo
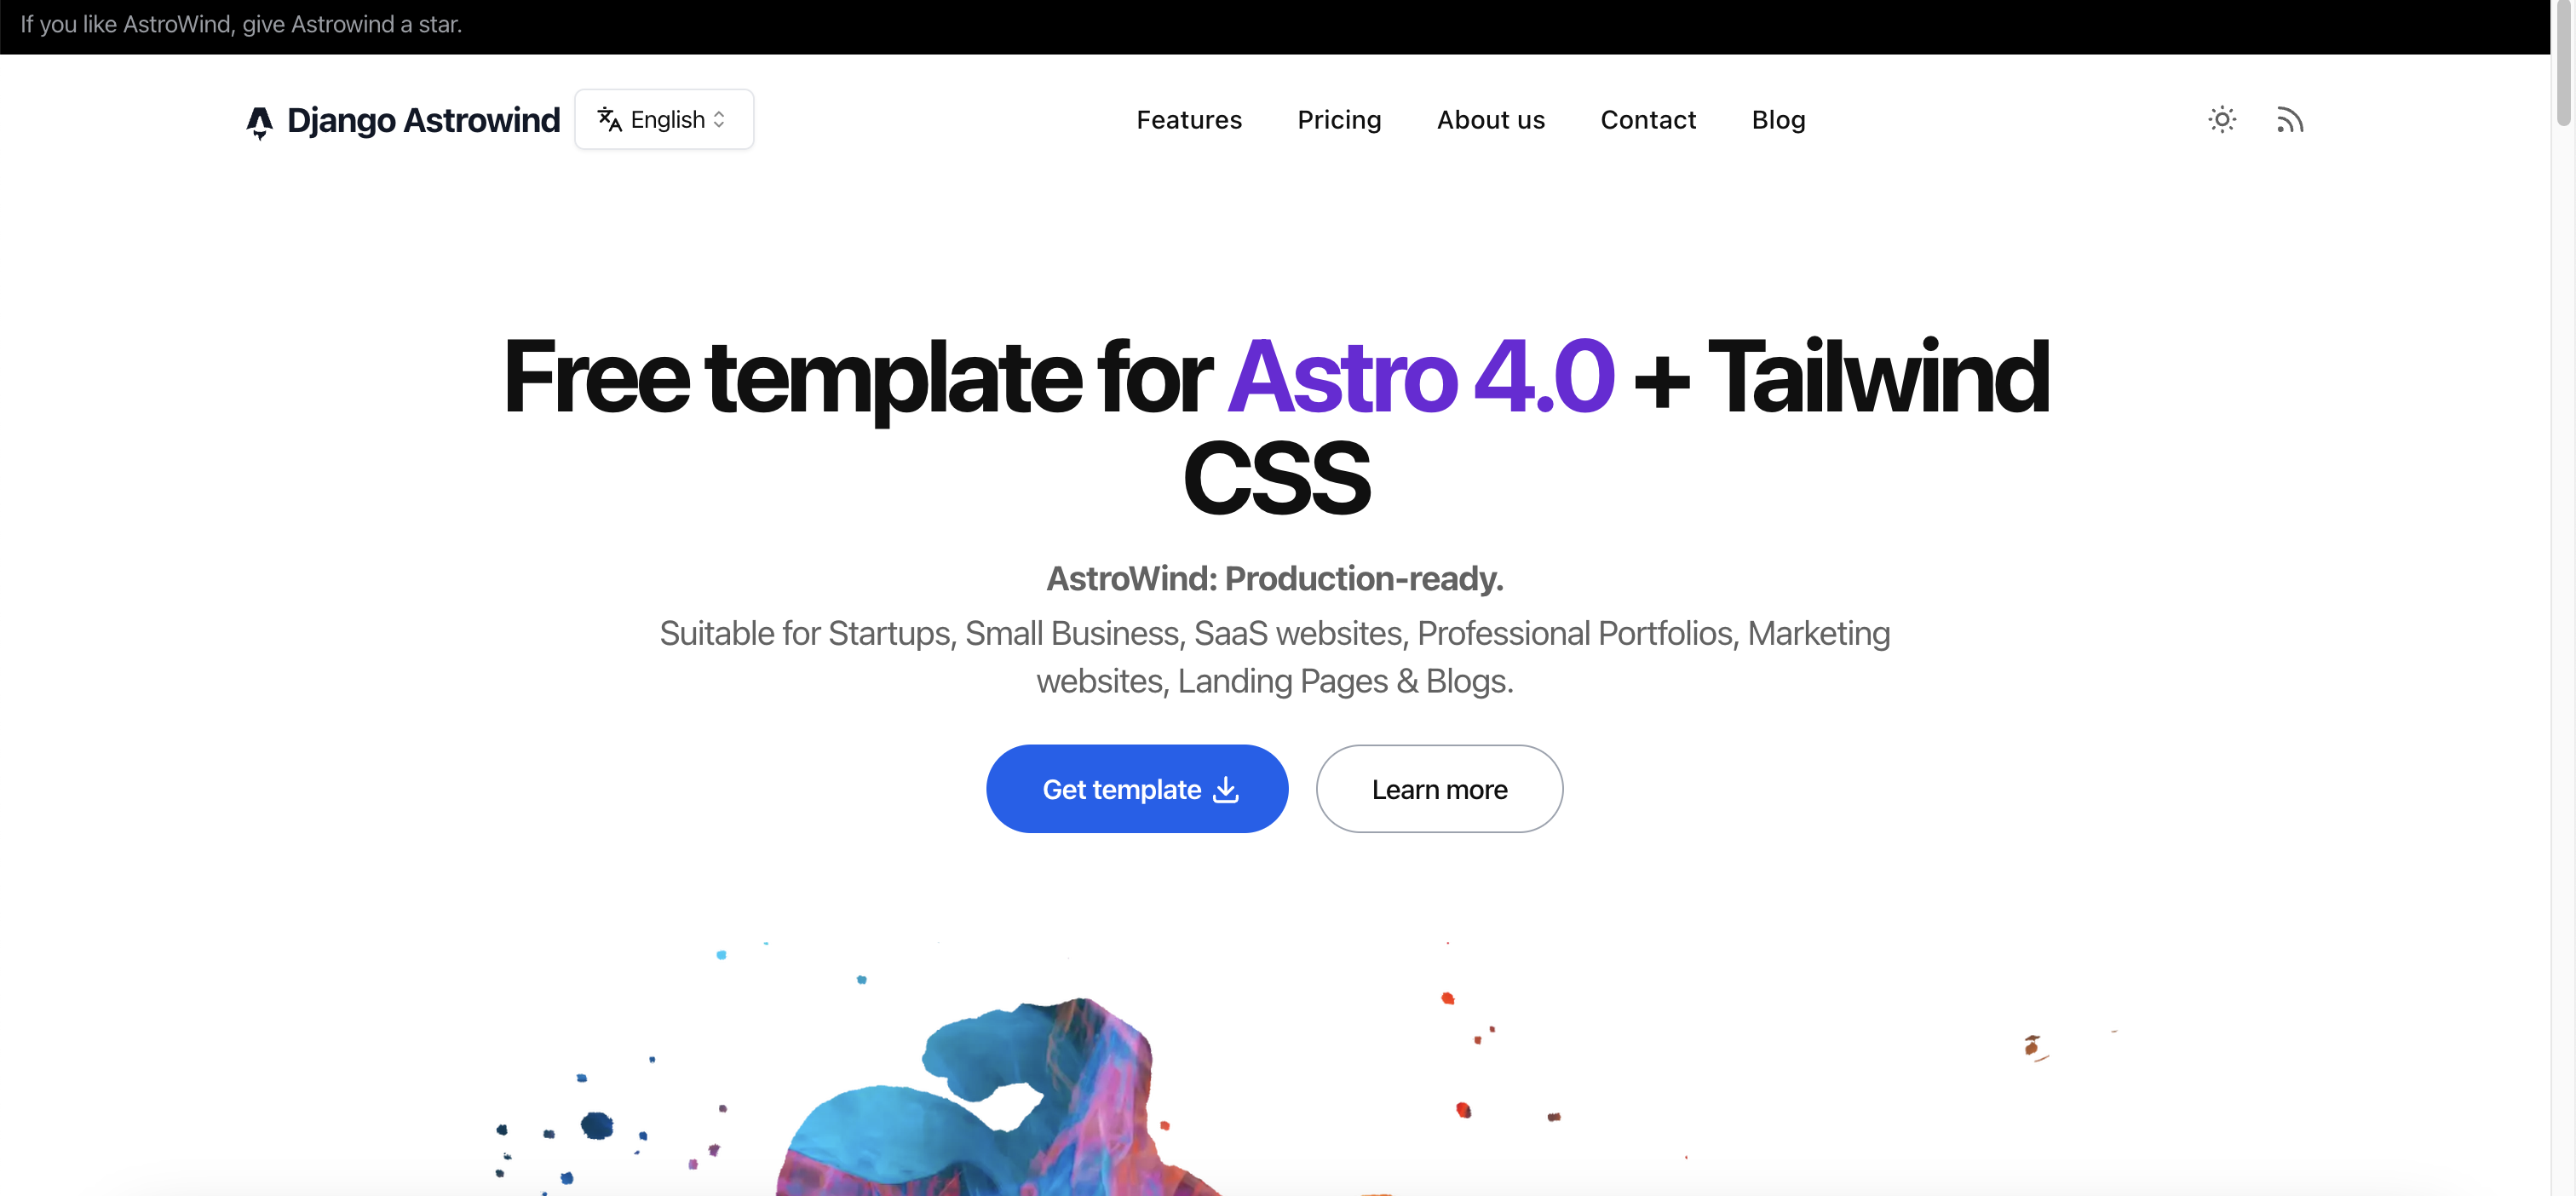
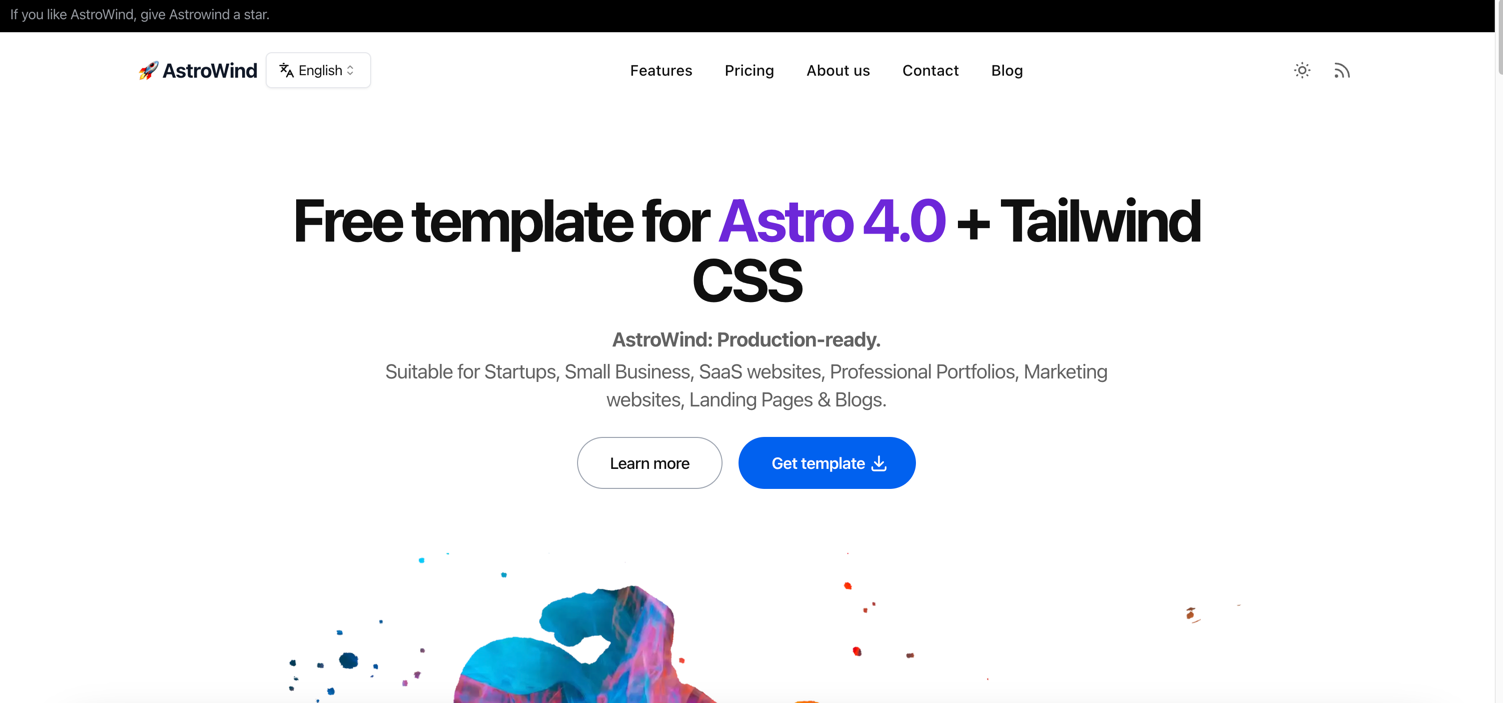
At the end of this tutorial, you will have a site that looks like this:
https://django-astrowind.netlify.app/en
What This Demo Includes
A. Backend - Django-Headless-CMS
Multi-language content support.
Auto-generated API documentation & playground.
Publish/Draft version management for content.
Reversible content.
Import/Export content.
Sortable items.
Markdown editor & preview.
Custom admin interface: custom language for the admin panel, custom themes.
API for Astrowind content.
B. Frontend - Astrowind
Multi-language UI.
Language switch button.
Dynamic slugs for different post pages/tags.
Additional Note
If you encounter any issues or errors while following this tutorial, please check the issues section or create a new one.
Prerequisites
Python >= 3.9 (you can use PyENV to easily install and manage your Python versions).
Cookiecutter installed. Refer to the Cookiecutter documentation for installation instructions.
NVM installed (required for using Astrowind). Refer to NVM GitHub for installation instructions, or alternatively, install Node.js >= 18.
Getting Started
a) Create a Workspace for Both Backend and Frontend
First, create a folder to contain both the backend (BE) and frontend (FE) projects:
mkdir "/path/to/parent"
cd "/path/to/parent"
b) Backend - Django-Headless-CMS Setup
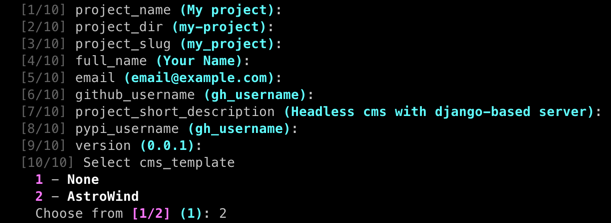
Make sure you have installed cookiecutter as mentioned above, then run this command to bootstrap our backend with an opinionated template. Note: Select option 2 - AstroWind template at step 10:
python -m cookiecutter https://github.com/huynguyengl99/cookiecutter-djhcms
Open the created project.
Follow the README.md inside the created project to initialize the backend, up to and including section 4. Getting Started.
After completing the setup, check the API.
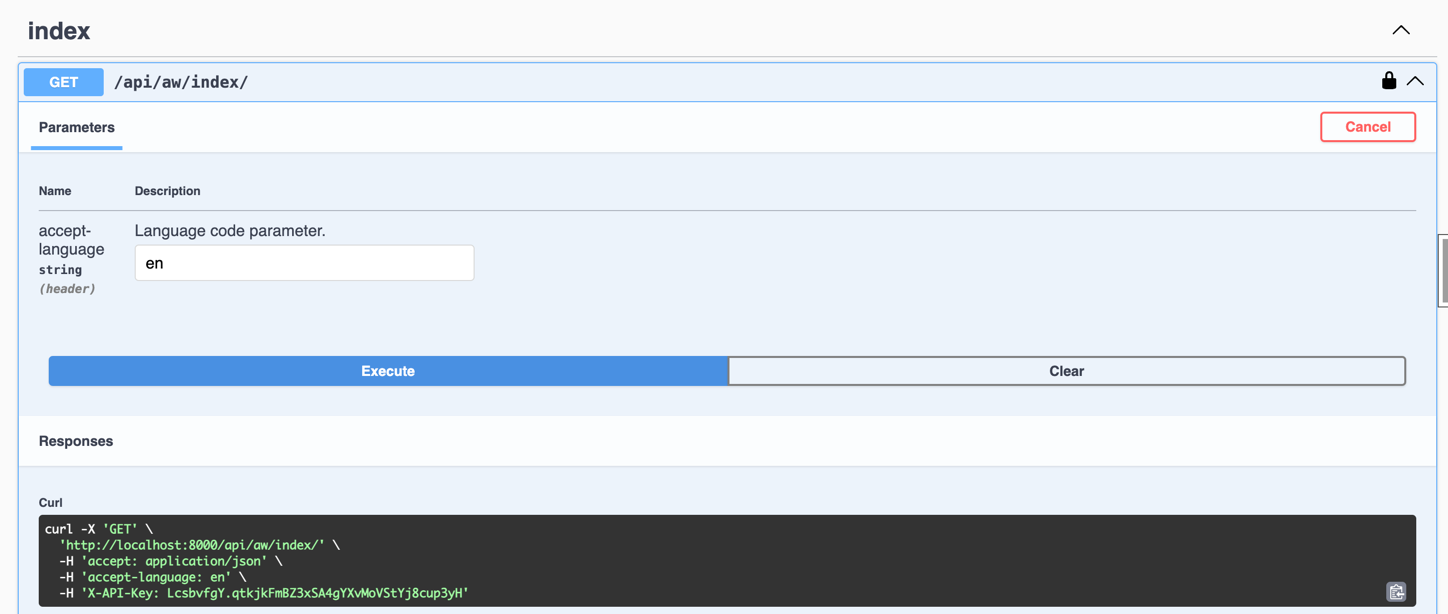
Visit http://localhost:8000/api/cms-schema/swg/ in incognito mode (to use the language code in the API header, otherwise it will be overridden by the Django admin language session). Input the generated API key in Authorize. (If you forget this step, refer to the BE README.md, which starts with In order to use the below API playground, create an API key).
Example:
You should receive a response like this:
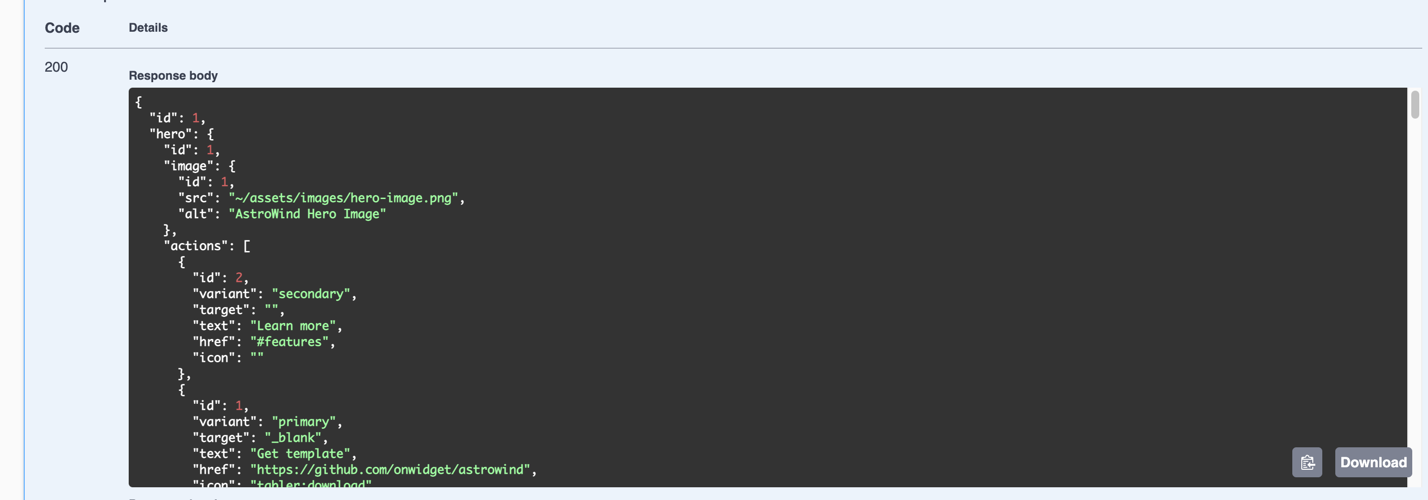
If you see the request and response as shown above, the backend setup is complete. Let’s move to the next part.
c) Frontend - Django Astrowind Setup
Change the directory back to the parent workspace.
Clone the GitHub repository (you can rename it if you want):
git clone https://github.com/huynguyengl99/django-astrowind.git
Open the cloned project.
Copy .env.TEMPLATE to .env and add the generated API key to the environment variables.
Install dependencies:
npm install
Sync schemas (from your backend API schema), types (inferred from your schema), and contents (fetched from your backend):
npm run sync:all
Note
- Your schemas, types, and content will be placed in the following files/folders respectively:
src/schemas/content.ts
src/types/content.ts
src/content/auto-*
Run the project:
npm run dev
[Optional] When you want to deploy the site, modify the src/config.yml file.
If everything works well, you should see the page open, navigate between tabs, and change languages, even for posts.
Examples: - Home page in English:
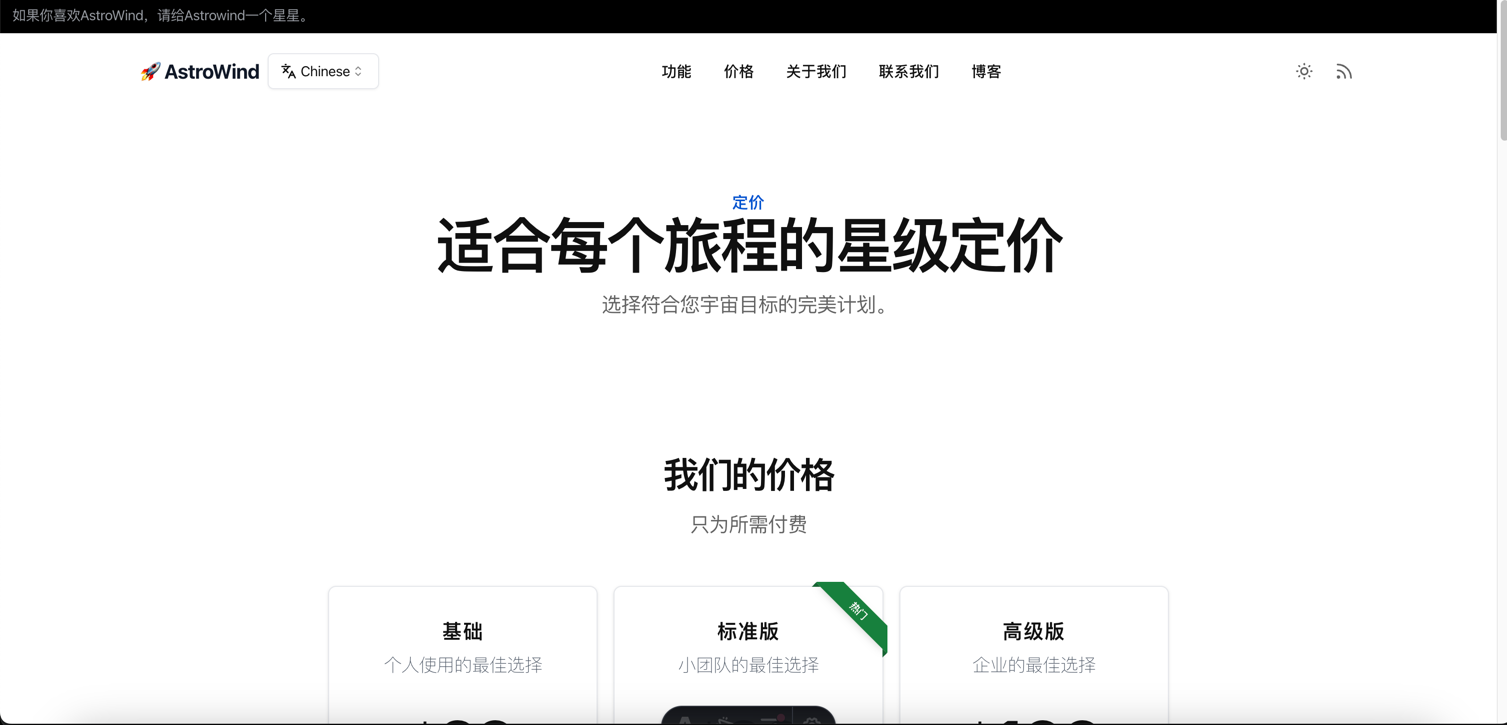
Pricing page in Chinese:
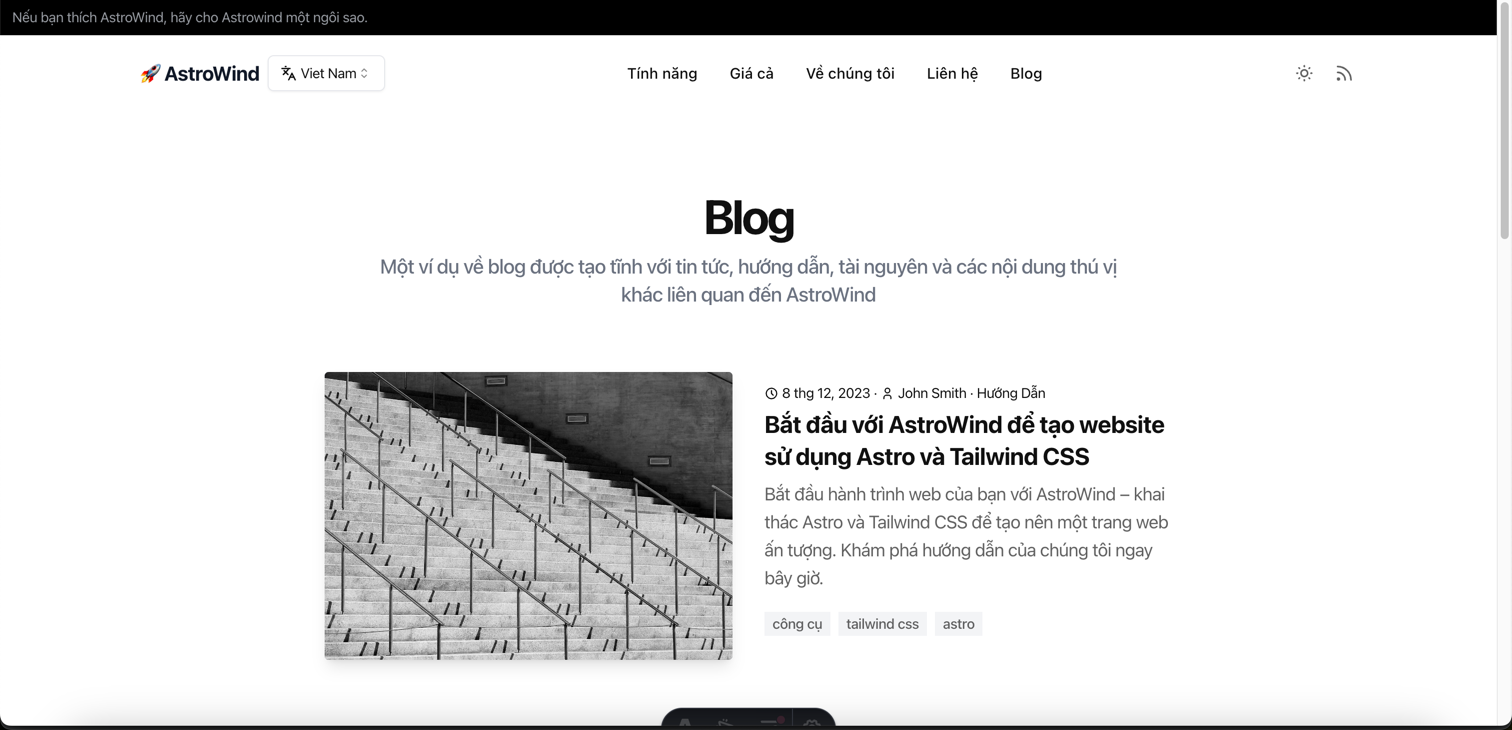
Post list page in Vietnamese:
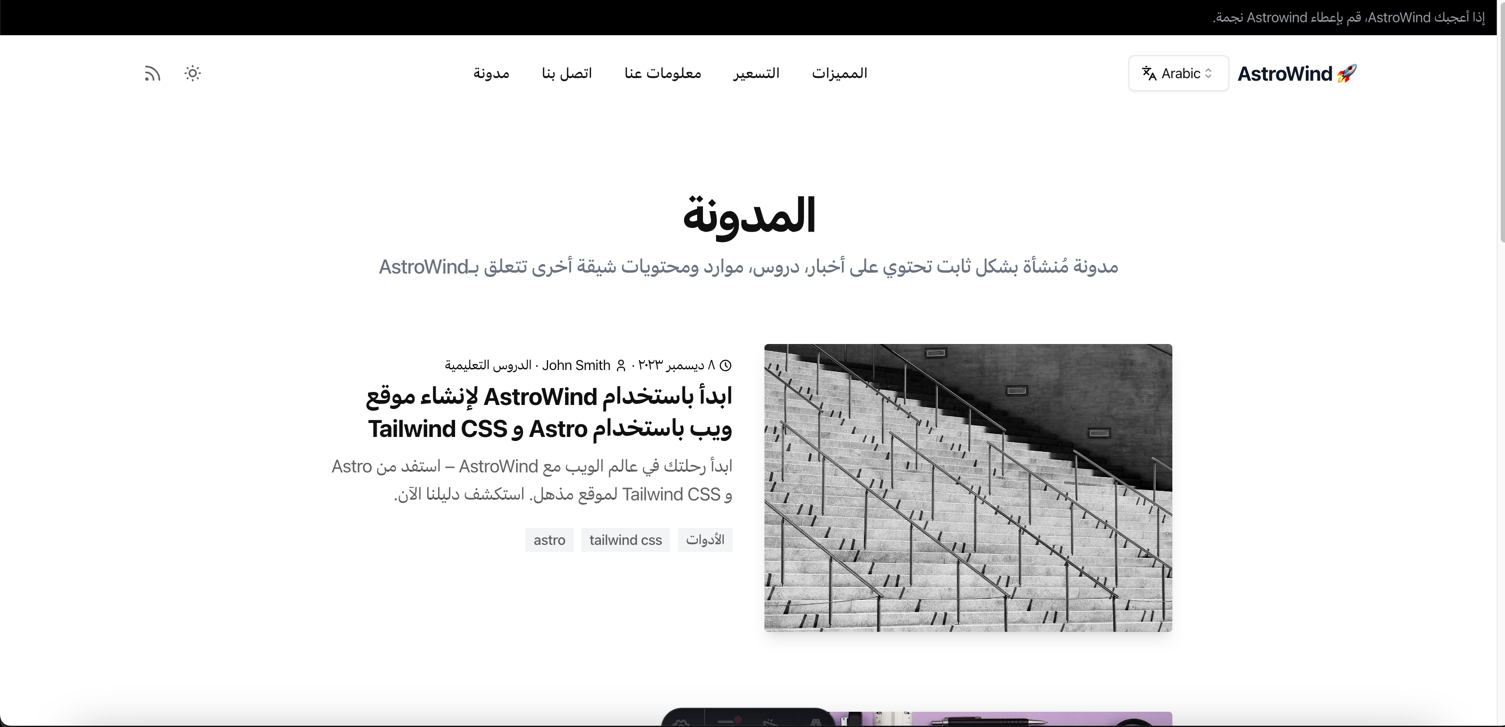
Post article page in Arabic:
d) Making Changes
Note
Remember to sync content with the command npm run sync:content every time you want to update data from the backend.
Visit http://localhost:8000/admin/astrowind_posts/awpost/1/change/ to update the first post.
Update the title field under the English tab to: Hello world.
Update the title field under the Vietnamese tab to: Xin chao.
Save the post.
Sync the API by running npm run sync:content in the frontend terminal. You will see that nothing updates (the last line you see would be > vite-node scripts/sync.ts).
Now restart the frontend server.
Visit the blog page again (http://localhost:4321/en/blog). You will notice that NOTHING HAS CHANGED (The title of the first blog is still the same). This is because the post has not been published yet, so the API call uses the published version, and the title remains unchanged.
Visit http://localhost:8000/admin/astrowind_posts/awpost/1/change/ again. You will see Item published (outdated)..
Click the Publish button to publish the post.
Sync the API again by running npm run sync:content in the frontend terminal. You will now see logs like Write to file /path/to/your/project/src/content/auto-posts/en/1.json (and so on for other languages).
Restart the frontend server again.
Visit the blog page again. This time, you will see the updated title.
e) Create a New Post and Auto-Translate Using OpenAI ChatGPT
This option is optional. Make sure that you are familiar with ChatGPT (very famous now); otherwise, you can skip this section.
Open your backend project and add your OpenAI key to OPENAI_API_KEY in the .env file.
Note
You can create your OpenAI keys at: https://platform.openai.com/api-keys.
Restart the BE server.
Visit http://localhost:8000/admin/astrowind_posts/awpost/add/
- Fill out the post in English, for example:
Title: My favorite post
Author: John Doe
Content:
# How are you?

This is the greeting, said in English.
Publish date: Click on today and now to auto-populate.
Click Save and continue editing.
Click the Translate missing button to use AI to translate the post into other languages.
Click Publish to publish the post.
Sync the API by running npm run sync:content in the frontend terminal.
Restart the FE dev server.
Visit http://localhost:4321/en/blog to see the new post at the top of the page.
Click the post to view its details.
Select other languages to see the post translated into different languages.
Troubleshooting
How to add other languages:
On the backend side, refer to the Translation documentation for more information.
On the frontend side, visit src/utils/languages.ts and uncomment (add) your desired languages. You can also change your default language as well.
When I increase the number of languages, the npm run sync:content command raises errors, and on the backend side, I see some Broken Pipe logs.
This is because the Django runserver command cannot handle multiple concurrent requests well. You can migrate to use the uvicorn command. For example:
uvicorn config.wsgi:application --app-dir ./your_project_slug --host 0.0.0.0 --interface wsgi
And that’s all about getting started with Django-headless-cms in conjunction with Astrowind. For more information, explore the other sections of the documentation.