How to Use
This section outlines the basic steps to use Django-headless-cms.
Define Models
Models are the core of Django-headless-cms, representing your system or content. It is crucial to invest time in practicing and designing your system’s database. Before proceeding, note the following regarding relationships:
To reference a single row, use ForeignKey.
To reference multiple rows, use ManyToManyField, with support for M2MSortedOrderThrough (explained later).
To define an abstract class that can be referenced by multiple other classes, use GenericRelation from Django content types.
Normal Model
Create models inheriting from LocalizedPublicationModel.
This base model supports auto import-export UI, versioning, publishing/drafting content, and auto-translation for any model that inherits it.
Don’t forget to register the model with @reversion.register(exclude=(“published_version”,)).
For multi-language fields with content varying across different languages, use the following fields:
# Fields from django-localized-fields
localized_fields.fields.LocalizedCharField
localized_fields.fields.LocalizedTextField
localized_fields.fields.LocalizedIntegerField
localized_fields.fields.LocalizedFloatField
localized_fields.fields.LocalizedFileField

# Fields implemented by django-headless-cms
headless_cms.fields.LocalizedUniqueNormalizedSlugField
headless_cms.fields.LocalizedBooleanField
headless_cms.fields.AutoLanguageUrlField
headless_cms.fields.LocalizedMartorField
Example:
@reversion.register(exclude=("published_version",))
class Action(LocalizedPublicationModel):
    text = LocalizedCharField(blank=True, null=True, required=False)
    icon = CharField(default="", blank=True)
Singleton Model
For singleton models, such as a model representing your Landing Page or Contact Page, inherit from LocalizedSingletonModel.
Example:
@reversion.register(exclude=("published_version",))
class IndexPage(LocalizedSingletonModel):
    title = LocalizedTextField(default=dict, blank=True, null=True)
    description = LocalizedTextField(default=dict, blank=True, null=True)
Title Slug Model
For models requiring a title field and a slug field auto-generated from the title (e.g., Post model), inherit from LocalizedTitleSlugModel.
Example:
@reversion.register(exclude=("published_version",))
class Post(LocalizedTitleSlugModel):
    excerpt = LocalizedTextField(blank=True, null=True, required=False)
    image = models.ForeignKey(
        PostImage,
        blank=True,
        null=True,
        on_delete=models.SET_NULL,
        related_name="posts",
    )
    draft = models.BooleanField(default=False)
    author = LocalizedCharField(blank=True, null=True, required=False)
    content = LocalizedMartorField(default=dict, blank=True, null=True, required=False)
    publish_date = DateTimeField(blank=True, null=True)
    updated_date = DateTimeField()
Dynamic File Model
For models that allow either file uploads or external links and return the source based on either field (e.g., an image model), use LocalizedDynamicFileModel.
Example:
class Image(LocalizedDynamicFileModel):
    author = LocalizedCharField(blank=True, null=True, required=False)
Sorted M2M Through Model
For a M2M through model that can be sorted via the admin interface, inherit from M2MSortedOrderThrough.
Example:
@reversion.register(exclude=("published_version",))
class PriceItem(LocalizedPublicationModel):
    title = LocalizedCharField(blank=True, null=True, required=False)
    subtitle = LocalizedCharField(blank=True, null=True, required=False)

@reversion.register(exclude=("published_version",))
class Pricing(LocalizedPublicationModel):
    prices = models.ManyToManyField(
        PriceItem,
        related_name="pricing",
        blank=True,
        through="PriceItemThrough",
    )

class PriceItemThrough(M2MSortedOrderThrough):
    pricing = models.ForeignKey(Pricing, on_delete=models.CASCADE)
    price_item = models.ForeignKey(PriceItem, on_delete=models.CASCADE)
Note
For self-referencing models, ensure you add fk_name, which is the field name of the parent model that the through model points to.
Example:
@reversion.register(exclude=("published_version",))
class Post(LocalizedTitleSlugModel):
    excerpt = LocalizedTextField(blank=True, null=True, required=False)

    related_posts = models.ManyToManyField(
        "self",
        blank=True,
        through="RelatedPost",
        symmetrical=False,
    )

class RelatedPost(M2MSortedOrderThrough):
    fk_name = "source_post"

    source_post = models.ForeignKey(
        Post, on_delete=models.CASCADE, related_name="source_through"
    )
    related_post = models.ForeignKey(
        Post, on_delete=models.CASCADE, related_name="related_through"
    )
Define Admin
Auto admin
To quickly set up the admin interface for your models, you can use the auto_admins utility provided by headless_cms.admin. This utility automatically registers your models with the Django admin site.
Example:
from headless_cms.admin import auto_admins
from your_app.models import Article, Post

auto_admins([Article, Post])
In this example, the auto_admins function is used to register the Article and Post models with the Django admin site. This setup allows you to manage these models through the admin interface without manually registering each one.
Manual Admin
If you want to extend or modify the admin interface, inherit from EnhancedLocalizedVersionAdmin. There are several utilities available to assist you in creating the admin interface, so be sure to check Admin for more information.
Define Serializers & Views
Auto Serializers
Django-headless-cms provides utilities to automatically generate serializers for your models, simplifying the setup of API views. Below is a simple example demonstrating how to use auto serializers along with custom pagination and viewsets. For more information, refer to auto_serializer.
Example:
from rest_framework.pagination import PageNumberPagination
from rest_framework.viewsets import ReadOnlyModelViewSet

from headless_cms.mixins import CMSSchemaMixin
from headless_cms.serializers import auto_serializer

from your_app.models import Post
from your_app.serializers import RelatedPostSerializer

class PostPaginator(PageNumberPagination):
    page_size = 10
    page_size_query_param = "size"

class PostViewSet(CMSSchemaMixin, ReadOnlyModelViewSet):
    queryset = Post.published_objects.published(auto_prefetch=True)
    serializer_class = auto_serializer(Post)
    pagination_class = PostPaginator
In this example, the auto_serializer function is used to generate a serializer for the Post model. Custom pagination is provided by the PostPaginator class. The PostViewSet class inherits from CMSSchemaMixin and ReadOnlyModelViewSet to provide read-only access to the published Post objects, with the related posts being serialized using RelatedPostSerializer.
Note
Remember to use .published_objects.published(auto_prefetch=True) for the queryset in your viewsets to ensure that only published objects are fetched, and to enable automatic prefetching of related data.
Manual Serializers
If you need to extend or customize your serializers beyond what is provided by the auto serializers, you can manually define your serializers. Inherit from LocalizedModelSerializer or other appropriate base serializers and customize as needed.
Example:
from headless_cms.serializers import LocalizedModelSerializer
from your_app.models import Post, RelatedPost

class RelatedPostSerializer(LocalizedModelSerializer):
    class Meta:
        model = RelatedPost
        fields = ['id', 'title']

class PostSerializer(LocalizedModelSerializer):
    related_posts = RelatedPostSerializer(read_only=True, many=True)

    class Meta:
        model = Post
        fields = ['id', 'title', 'content', 'related_posts']
In this example, RelatedPostSerializer and PostSerializer are manually defined to provide custom serialization logic. The PostSerializer includes a nested RelatedPostSerializer to handle related posts.
Refer to Serializers for more information.
Admin Dashboard
Detail Page Features
Once you register your model with the Django admin, you will have access to the following features when viewing the detail page (update form) for individual objects or content:
Published status: Unpublished | Published (Outdated) | Published (Latest)
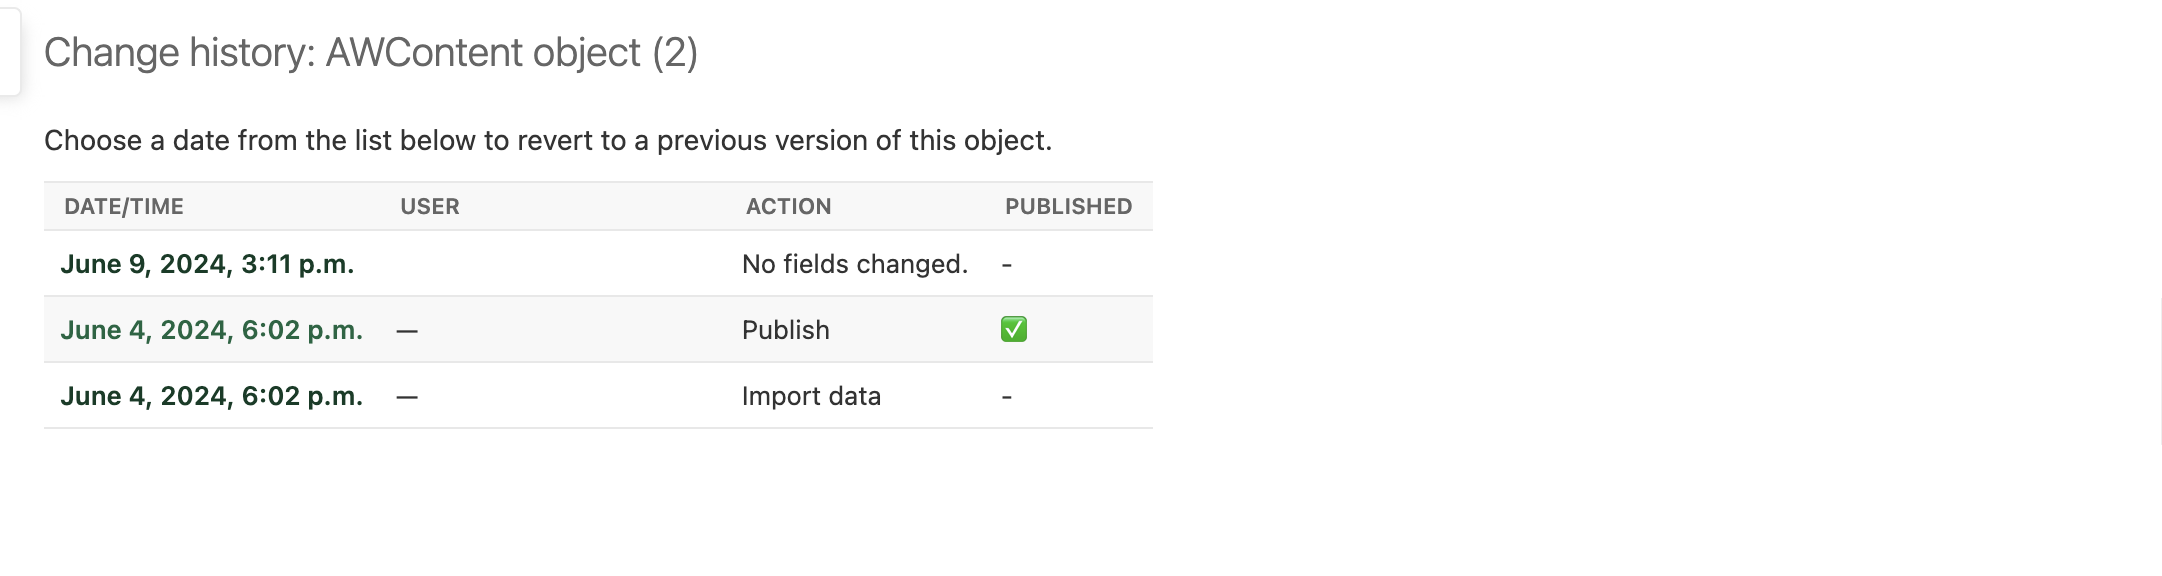
History: View your object’s version history, including which version is currently published.
Publish actions: Publish, Unpublish, or Recursively Publish content.
Multi-language fields: Use tabs to switch between languages.
Sortable inline items: Drag and drop to reorder.
Preview related models: View related models in modals.
Translation tools: Translate missing fields, force re-translate all fields, translate children, and force re-translate children.
Export: Export individual rows.
List Page Features
When you visit the admin list page, you will have access to the following actions:
Recover deleted items
Import data
Publish/Unpublish items
Translate/Force re-translate items
Export data
Admin Extra Features
For additional admin features, such as updating the interface language via the admin panel, refer to django-admin-interface. This package provides a range of enhancements to the Django admin interface, offering more customization and flexibility.
API Documentation & Playground
To enable API documentation and the playground, add the following line to your Django urlpatterns. This will automatically document all of your Views/Viewsets that inherit from CMSSchemaMixin:
urlpatterns = [
    # other urls
    path("", include("headless_cms.schema.urls")),
]
API Documentation
Visit the Redoc API Documentation at http://localhost:8000/api/cms-schema/redoc/ (replace localhost with your backend’s deployed URL in the production environment) to view your API documentation.
API Playground
Note
To change the accept-language header when testing the API, open the URL below in incognito mode. Otherwise, your session language might override your header language. This issue may occur if you have integrated the language selection feature of the Django admin interface.
Visit the Swagger API Playground at http://localhost:8000/api/cms-schema/swg/ (replace localhost with your backend’s deployed URL in the production environment) to interact with your API. Remember to set the accept-language header with the desired language code or leave it blank to use your default language.
Django Management Commands
Django-headless-cms provides several useful management commands to assist you:
Clean Outdated Drafts: Cleans up outdated drafts.
Export CMS Data: Exports your entire CMS data, supporting multiple formats.
Import CMS Data: Imports your exported CMS data from a local file or remote URL.
For more information and detailed usage instructions, refer to the respective documentation for each command.
How to Use Admin Panel
The Django-headless-cms admin panel offers several features to help you manage your content efficiently:
Publish/Draft & Versioning Content
Publish/Draft content
Versioning content: Revert to any previously saved version
Recursive publish

Translation
To set up the languages for your content, you need to configure the following settings in DJANGO_SETTINGS:
LANGUAGE_CODE = "en"  # your primary content language

LANGUAGES = [
    ("en", "English"),
    ("af", "Afrikaans"),
    ("ar", "العربية"),
    # list your languages, with the primary one at the top for convenience
]
Auto-translate objects (if using OpenAI) and recursively translate.

Reset Translation
Note
- To reset translations, follow these steps:
Clear the content of the primary language.
Click on Translation Missing.
All your content will be flushed. You can now add your primary language content again.
Markdown Editor
Use LocalizedMartorField to add a markdown editor field with multi-language support.
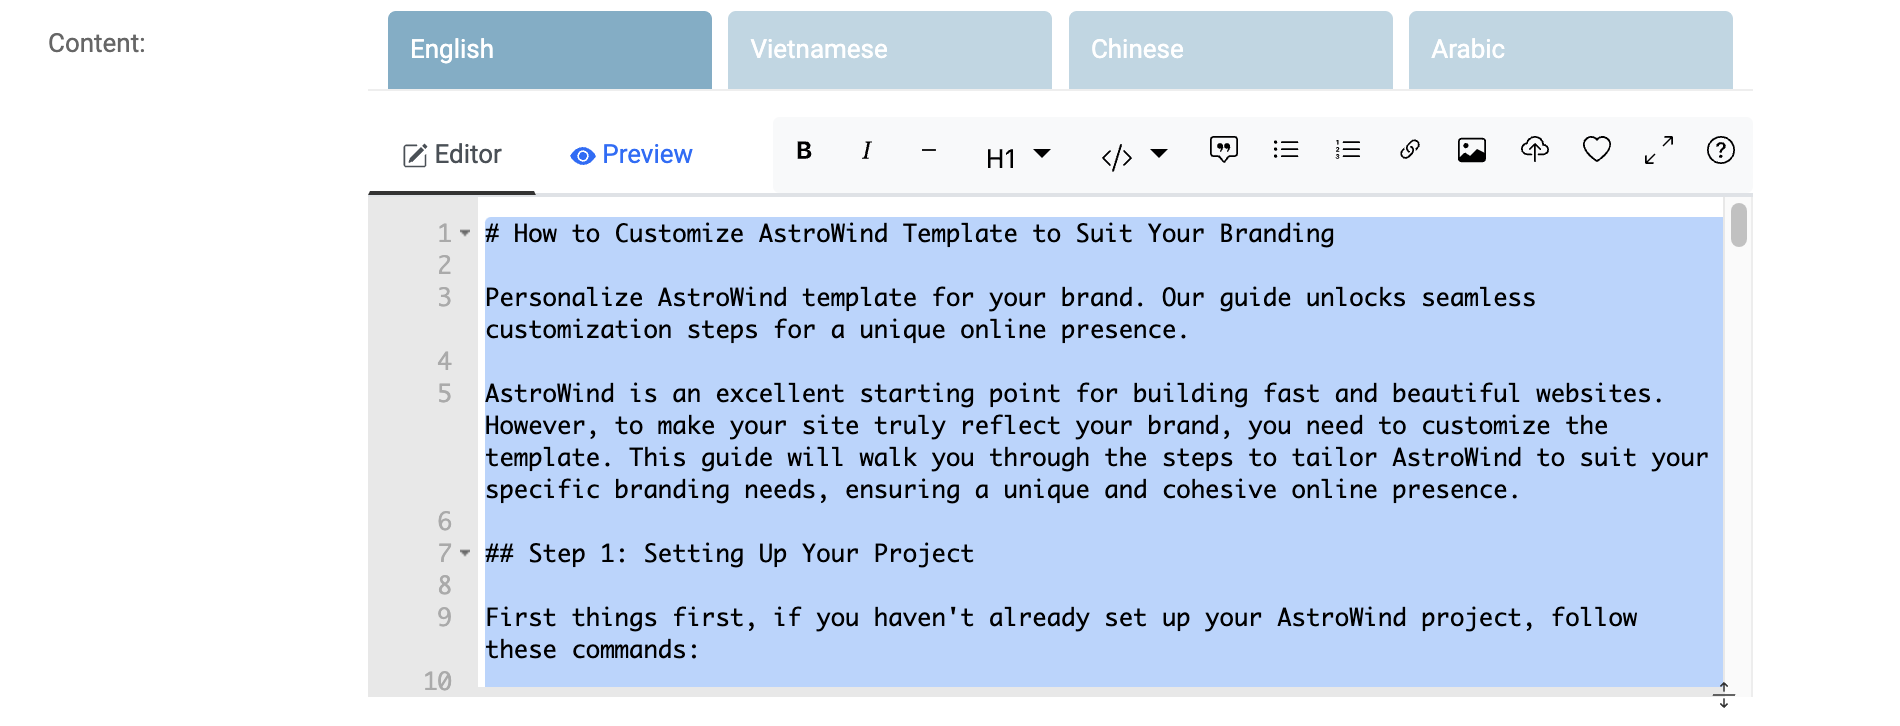
Preview the markdown content and its utilities inside the editor.
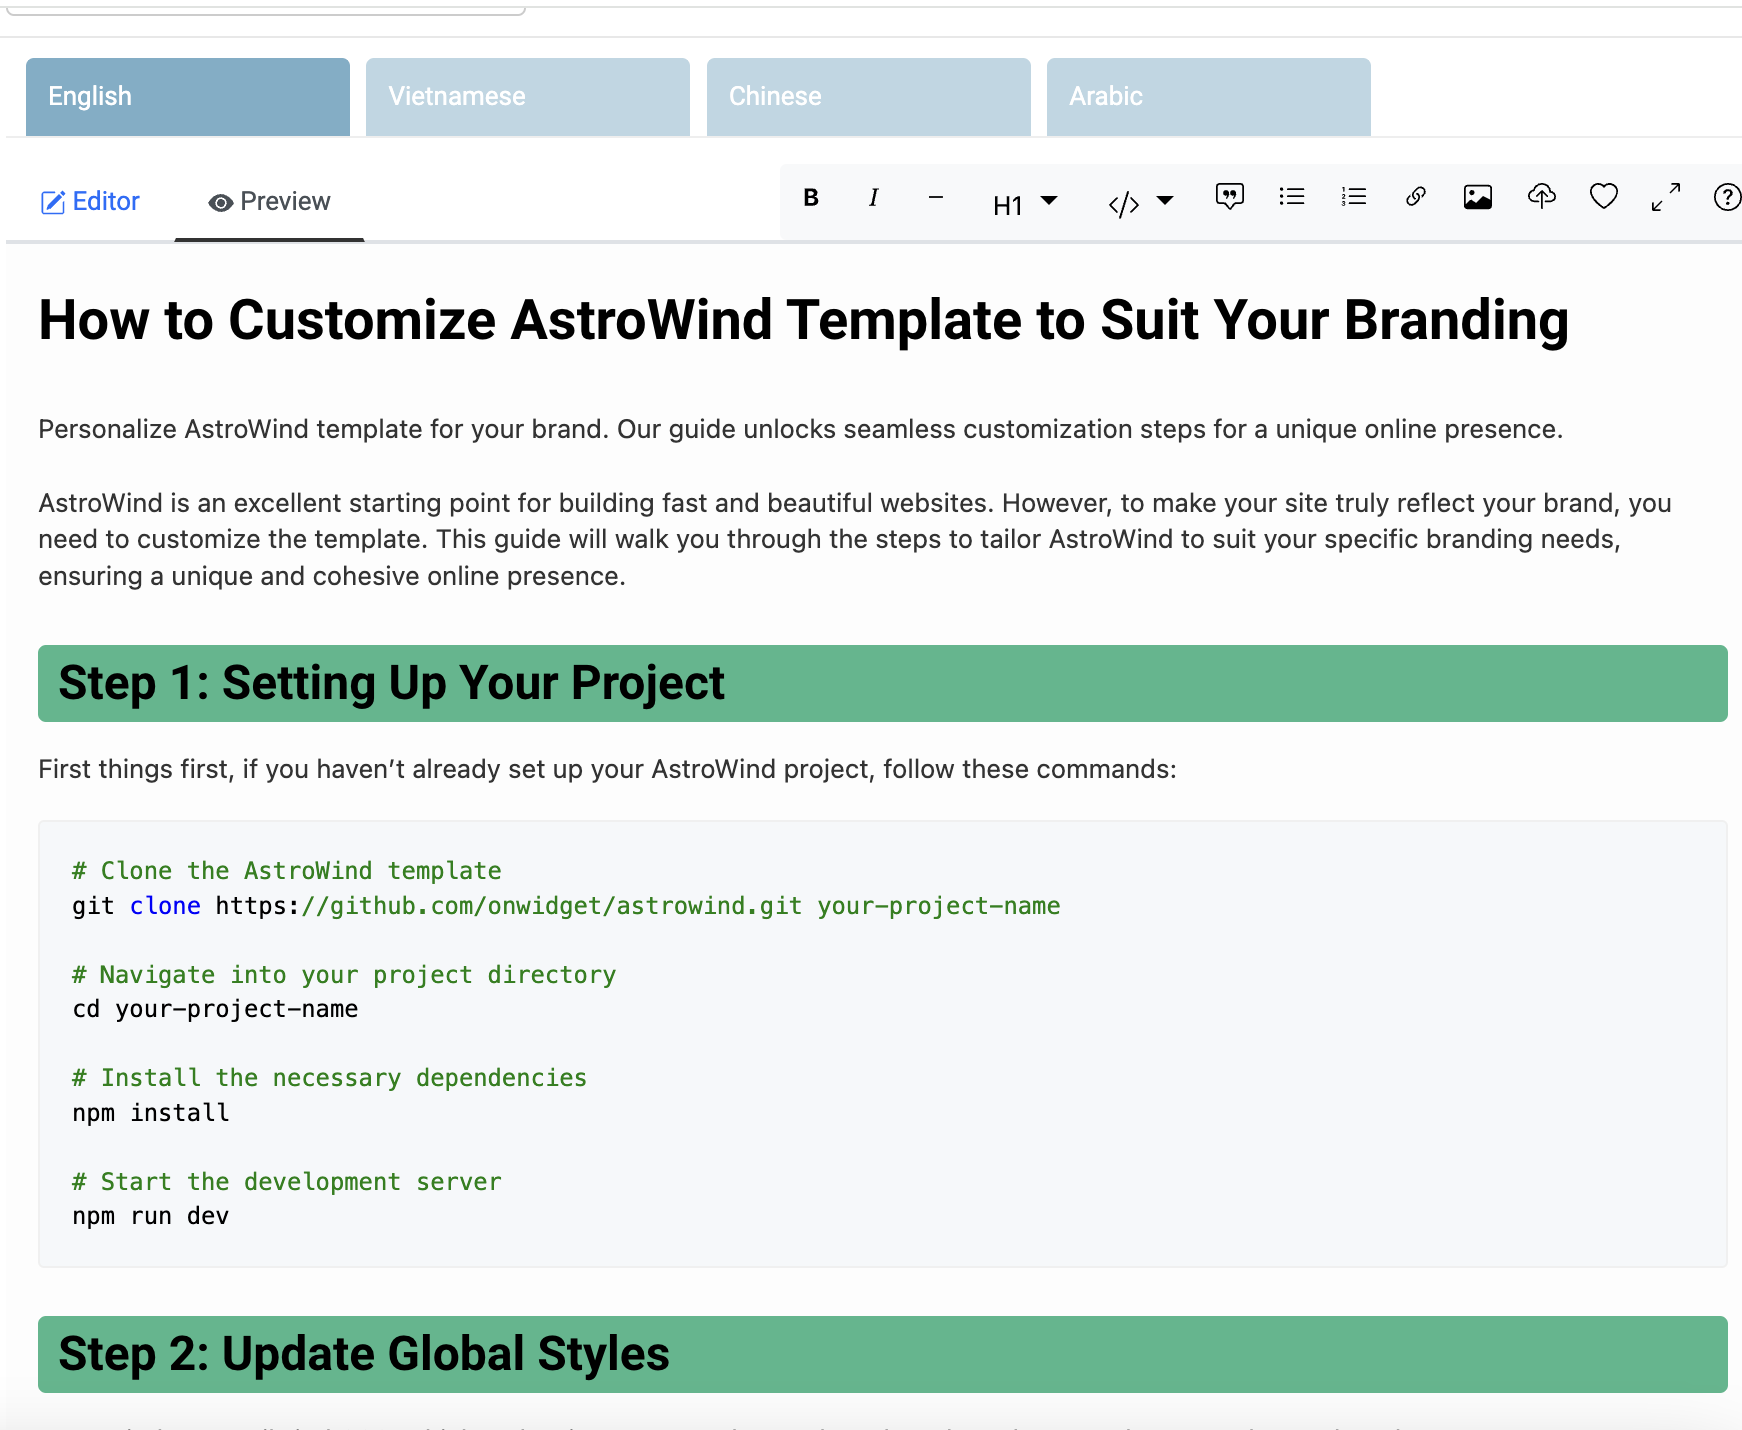
Preview the content in full screen to focus more on editing markdown content.
For more customization options for the markdown editor, refer to the Martor original documentation at django-markdown-editor (Martor).
Import/Export Items
Single Item Export: Use the export button at the end of the admin page to export a single item (you may need to update the django-import-export package to have this feature).

Multiple Item Export: Use admin actions in the list view to export multiple items at the same time (see the Admin List Actions section).
Import Items: Use the import button on the admin list page to import exported content into your system. Note that imported items will be unpublished by default.

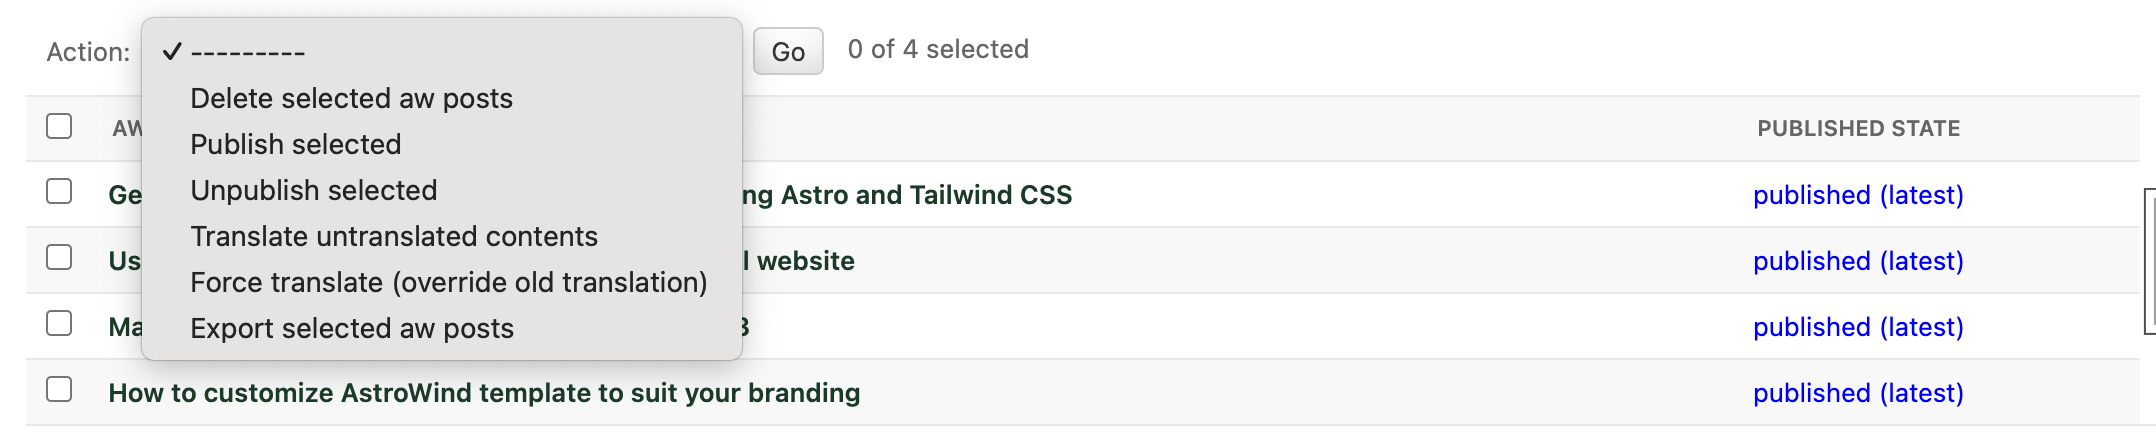
Admin List Actions
On the admin list page, you can perform actions on multiple items:
Publish/Unpublish items
Translate/Force re-translate items
Export items